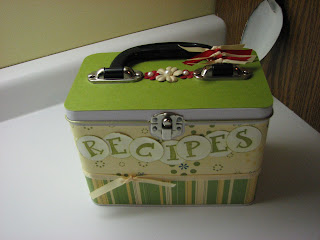
This was my first paper covered lunch tin. I had made a few using chipboard and embellishments only but I finally got up enough courage to do a cardstock covered tin. I love the fresh vibrant colours of the cardstock, mind you I can't remember what the name of the DP pack it was from. I used Vanilla ribbon to wrap around the tin and Vanilla and Real Red grosgrain ribbon to tie around the handle. I found this gave a nice break to the black handle. I used Prima Flowers and Half Pearls from our Pretties Kit on the top of the lunch tin for decoration and to be quite honest, to cover the cut in the cardstock to get the paper around the handle. LOL Sneaky, I know. I used the retired alphabet set - Upper Alphabet Fun for stamping out the word Recipes and punched them out using the 1 3/8" circle punch. I then used my Old Olive ink and applied to the edges of the punched out letters to add a bit of a distressed look. 

What is a recipe tin without recipes, right? And to keep those recipes organized you need dividers with a label so you know which section to look in, right? So I stamped the image using the retired set, Recipe Fun, and used my watercolour pencils to add some colour to them. I then stamped the images out using the 1 1/4" circle punch and layered on a pc of old olive that I punched out using the Scallop Circle punch. I attached them to a pc of cardstock and there you have some easy dividers. I am not sure why the pic rotates when I load it but I was unable to fool it into loading the way it is on my system. Weird eh?

No comments:
Post a Comment