Tuesday, December 22, 2009

Sneak Peek #3

Here we are on to another day and another sneak peek card.
The sentiments are from the upcoming Occasions Mini release, Messages for Mom. I began by stamping Mom in Chocolate Chip ink onto a sweet new little scalloped note card, also from the Occasions Mini. In So Saffron ink I stamped the sentiment "Happy Birthday". I was serious when I said I love just about everything in this new mini. :)

Next I layered "Mom" onto a piece of So Saffron cardstock, which I rounded the corners using my small corner rounder. Then I tied a bow on this layer with Pink Taffeta ribbon.

The card base is Pretty in Pink and once again I used patterned paper from the new Sweet Pea paper pack.

Finally I popped up my main sentiment with pop up dots.
This card actually took me a good half hour if not more. I think I was getting really tired and was having difficulty focusing. It didn't turn out anything like what I thought I might make which is another good sign that I was tired. LOL

Well, I don't know how much more stamping time I will get in over the holidays but I hope to have more to share with you soon.

Thanks for stopping by.

Margaret :)

Monday, December 21, 2009

Sneak Peek #2


Good morning and welcome to the week of Christmas. I can't believe we are 4 days away from Christmas. So much to do, so little time.

I had a crazy weekend but got quite a bit done. I am really really looking forward to the holidays and spending time with Chris and the girls and hopefully some friends too. :)

Today I have another card for you made once again with the Vintage Vogue set that will be released in the Occasions Mini. This "ingredients" are pretty much identical to those of the card from Friday.

So I began by stamping a floral image on Whisper White cardstock with Old Olive Ink and then layered this piece onto a Chocolate Chip cardstock matte. Next I stamped a flower and cut it out with my paper snips. I layered it on a scallop circle of Taken With Teal cardstock. Then I curled up each petal slightly for a more 3-D look, added a small piece of felt to the center of the flower and then attached it to my white and chocolate matte.


I layered that same beautiful Sweet Pea paper I used Friday onto some Old Olive cardstock and attached to my Whisper White card base. I then used this fantastic "frame" image from the Vintage Vogue set to add a touch of class above my layers. The last little thing it needed was a sentiment and the "You raise kindness to an art" was just perfect for this bright and happy card.

This set is so versatile and the papers just incredible that I am sure you will be adding them to your wish list as well.

Tomorrow I will have a sneak peek from another new set coming out in January, so don't forget to check back in.

Thanks for stopping by and have a great day!

Margaret :)

Friday, December 18, 2009

Sneak Peek #1


Good morning and happy Friday!!!!

Do you know what this means? Yep, tomorrow I begin my holiday shopping. I am super excited and can hardly wait. It has been a very busy month for me and unfortunately I have had no time to get out sooner to do it.

We are more than halfway through December already and I think this is the first time I have stamped in a few weeks. January is fast approaching and with it comes the new Mini catalogue which means fab new products. Just to whet your appetite I am sharing one of my creations today using some (okay, quite a few) new products from the new Mini. I have to say.... I am SO excited about this one. Everything in it is incredible.

So, for todays card, I used a new set coming out called Vintage Vogue. I began by stamping my image with Rose Red ink onto Whisper White cardstock. I layered my image on some Taken with Teal cardstock to make it pop. I grabbed my Mat Pack and added some "stitching" around the edges (this goes very well with the tiny dots on my patterned paper) Next I grabbed the beautiful new Stitched Felt and selected a flower, a leaf and a center dot for the middle of my flower. I attached them beside my image using glue dots. Oohhhh, so pretty already.


For the base of my card I used Whisper White cardstock and placed a layer of Old Olive cardstock over top. Then I added a layer of... wait for it.... yep, some new Designer paper called Sweet Pea. You have no idea how gorgeous the paper is in this package. I've liked the papers in the past but this WOW and ... there are 48 sheets of paper in this particular pack. It is better than any paper I've seen from competitors in the stores and trust me, I love patterned paper and I am always flipping through paper packs in stores but if only a few tickle my fancy, I won't buy it. This one however has blown me away. I've just begun to make some cards with it and already I'm thinking I may need to buy another pack LOL.

Okay enough drooling on my part over the paper. So I obviously attached this to my card base and I finished the card by popping up my image with pop dots.

I have been so card deprived lately that when I got into my stamping room last night, I whipped this up in about 15 minutes, maybe even less. I was so thrilled to just be able to create that this card flowed from me.

I have so many neat products to show you over the next couple weeks that you may just want to get a paper and pen out and begin writing a with list (no need to call me an enabler, I already know I am - thank you!! :)

I hope you all have a wonderful weekend and I will actually be back Monday with another post for you.

Thanks for stopping by.
Margaret :)

Thursday, December 10, 2009

Surgery Day

As I write this, 2 month old baby Jude should be in surgery. The surgery should have begun at 10am this morning if all is on schedule.

It would have been a very snowy drive for Peter and Angela this morning. I know they planned to leave at 4AM to arrive on time and I really hope they did as the drive likely took them a lot longer with the road conditions. Especially considering they are even further north than I am.

I ask once again that you will say a prayer for them, the surgeons and of course baby Jude that all may be well.

This will be a very long day for them as the surgery will take at least 5 hours.

Thank you for your prayers for all of them.

Margaret

Tuesday, December 8, 2009

Your Prayers Are Needed

Today I am bypassing posting one of my creations. I would like to share with you the story of a close friend of mine who will need lots of prayers come Thursday especially and in the week(s) to follow.

Some of you already know her through my Stampers 10 club but may not be aware of her baby's story.

My dear friend Angela found out about early summer that her unborn baby had only one kidney. As time passed the doctor's felt comfortable enough allowing her to have the baby in the hospital in her hometown rather than making the 2+ hour journey to the hospital in London. Peter and Angela's fourth child, baby Jude, finally made his arrival on October 4th weighing 9lbs 10oz. Although he arrived safely, he was born without a hole in his bum. After 12 short hours in our world baby Jude underwent surgery. I am a bit fuzzy on all the details and facts so I do apologize to Angela and family if I provide some incorrect details. I do believe this surgery was to provide him with the necessary hole.

Over the past two months there have been some hiccups and some complications but Jude has been getting bigger each day.

This week though, on Thursday, Jude will be undergoing a 5 hour surgery with two senior surgeons to correct his issues. Although the surgeons are very confident that all will go well, with Jude being such a young baby for starters and then the fact that he only has one kidney, one of the great concerns is the anesthetic. Babies are so small and it is hard to keep them under anesthetic without doing damage. The other thing is, the kidneys filter the anesthetic and if Jude's one kidney can't handle it, he doesn't have the backup of a second kidney.

Angela and Peter are very humble people and their faith in God is very strong. Normally Angela, even in the most difficult times, will not outright, ask for prayers but rather ask how things are with you and then keep you in her prayers. However, at this time, they have set aside their pride as they understand the great need for prayer to get Jude and them through all this.

All your prayers and well wishes are needed very much for baby Jude and his family. Please remember them each day and pray that God will give the surgeons the knowledge, skill and guidance they need to complete the surgery safely. Please pray that God will provide the family strength. I read Angela's blog and found that she has a list of prayers she would really appreciate people making for them. Please take a moment of your time to do this. I truly believe prayer works and I am very thankful to all of you for praying for them.

Here is Angela's prayer request:

1. Safe travel back and forth to London during the next several weeks.

2. Health for our whole family as we enter this busy season

3. Jude's surgery on Dec.10th from 8am-1pm
Please pray for - good health going into the surgery
- Dr.Butter and Dr. Merrit, who will be performing the surgery.
That they will see everything they need to clearly and that God will
guide them through this difficult procedure.
Update: After speaking with the anesthesiologist, we are praying that
the surgeons will be able to accomplish the entire surgery laparoscopically. This will shorten the length of the surgery (and the time Jude is under anesthetic) and make his recovery much easier on him. If they are unable to do everything laparoscopically, the surgery will be much longer and harder on Jude. Also, the anesthetic itself is more dangerous because Jude only has one kidney to filter it out. Please pray that Jude's body will be able to handle the anesthetic and for the
shortest surgery time possible.
- that God will carry Jude successfully through the whole operation
- that Jude won't have a bad reaction to the anesthetic
- that God will use Jude's life, and our presence in the hospital,
to bring Him glory! Update: We were originally told that I would be able
to stay overnight with Jude in his room. Unfortunately, we found out
yesterday that I might not be able to. If there are no private rooms
available, it's hospital policy that parents (even nursing mothers) cannot
stay overnight in the room. There are visiting lounges where parents can
sleep on the chairs or couches. I'm hoping to stay in the lounge so I can
continue to nurse Jude during the night but if they are full as well I would
have to stay at the Ronald McDonald house. Please pray that I would be able, as much as possible, to stay with Jude and feed him myself. We know that God has a plan - pray that I would rest in it and trust Him.

4. For Gracie Jo, Silas and Levi as they go to our parents while I'm in the hospital with Jude

5. For John & Nancy (Peter's parents) and John & Grace (my parents) as they care for the kids - lots of energy!! :)

6. For Peter, as he continues to work and travel back and forth to the hospital to visit.

So there you have it, folks!! Thank you for hanging in there with us and standing in the gap!

We are thankful beyond measure to know our family is being covered in your prayers.


If you would like to read more on Angela and her family and what a wonderful and strong person she is, click here.

Again, thank you to everyone who is prayer for them.

Margaret :)

Friday, December 4, 2009

A Touch Of Nature


Happy Friday all!!!

I went to my last photography class last night. I can't believe that 8 weeks has blown by just like that. For some reason I thought we still had one more class.
I haven't had a whole lot of time to play in my stamp room lately but last weekend I did manage an hour or two and one of the things I created was this sweet card.

I love uniquely shaped cards and scallop circle cards are one of my fav's. I began by cutting out my base in Chocolate Chip textured cardstock using my Scallop Circle BigZ die. I used my Scallops 2, to create the smaller Barely Banana scallop. I then ran the smaller scallop through my Big Shot again with a texture plate to add some dimension to the scallop. I cut a circle out of whisper white cardstock using the Circle Scissor plus and then stamped my tree image from Thoughts & Prayers. I adhered this to my small scallop circle and then popped this up on my card.


Then I ran my large butterfly BigZ die through the Big Shot and selected the smallest butterfly for the card. I ran it through again with the texture plate to make it stand out more. I stamped my sentiment using the Teeny Tiny Wishes set and punched it out using the small oval punch. This layered nicely over the center of the butterfly and finally I attached this to my card.

Thanks for popping by and have a great weekend.

Margaret :)

Tuesday, December 1, 2009

Mini Calendar


I am finally sharing my mini calendar with you. I completed this awhile ago. This mini calendar and stand can be found in the current Holiday Mini catalogue that is valid until the first few days of January.

I covered the chipboard stand with some retired designer paper. This is very easy to do. I layed my chipboard on my patterned paper and traced the outline. Next I used my paper snips to cut out the 'template'. I found that my glue stick worked best to adhere the paper to the chipboard.


I wanted to keep the colours clean and simple, so with the calendar lettering being Soft Suede I went with Old Olive to stamp my images. I did my best to select an image that went well with each month. This is perfect for your desk and with the images being a fairly light colour, you can still add notes along the left side. This is great to add birthday reminders or appointment reminders. The best thing is, this calendar takes up very little room.

I always appreciate your comments and thank you for popping in regularly to see what I have to share.

Have a great day!
Margaret :)

Monday, November 30, 2009

Three Little Words


Good morning and I hope everyone's Monday is starting off well. I had another busy weekend but it was good.

Saturday I took Chris and the girls over to my old Christian school for their annual bazaar. I know that they always have some Dutch treats there that I was used to having around Christmas time growing up. Since I haven't had them in several years I wanted to take them there to give them the opportunity to try them out as well. We browsed around and the girls went to a reptile show, I picked up a hand knit shrug style top for a very reasonable price and of course we had some food. I'll be honest... I wasn't expecting to feed them lunch but once we got into the gymnasium and they saw all the good food there, they just had to have lunch. Chris and Aris' boyfriend had chili, Aris and Taygan played it safe with hotdogs and I was torn between Boerenkol and Nasi but I settled on Nasi (a rice dish) Pretty much everyone had a taste of my Nasi and loved it. Aris kept asking for more so I knew she really liked it. Then for some more Dutch flavor, I ordered each of us one olliebolle, mmm mmm good. Not everyone was crazy for those but I love them. :) Last but not least was Croquettes and only Blake and Chris tried those. I don't think they were too keen on them as I finished them off. LOL - Can't always win. At least the total cost for lunch and treats for 5 of us only came to $19.00 - were else can you get a good decent meal for 5 people at that price.
Okay, so enough about the good Dutch foods and on to my card. Although these are very much Christmasy colours, this card is not intended to be a Christmas card. I think its simply that we are at the time of year where the hands want to automatically grab the traditional green and red colours.


The card is 5.25" square, made from textured Kiwi Kiss cardstock. I finally pulled out my Manhattan Flower embossing folder and embossed the image on a piece of Vellum cardstock. I layered this onto a piece of Real Red textured cardstock and tied a bit of Real Red grosgrain ribbon and silver elastic cord around the top of these layers. I popped this up on my card front with my dimensionals and then I used my Three Little Words stamp set to stamp my sentiment along the side.

It was a simple card but I was really just looking for something to make quickly with the embossing folder.

I hope you all have a great day and I hope to have you back here again soon.

Cheers,
Margaret :)

Wednesday, November 25, 2009

Holiday Greetings


Happy Wednesday everyone!

It has been a crazy week, but good. Next weeks schedule looks a bit quieter so I think I will start cracking on my Christmas cards and get those in the mail. I have a few to start but I need lots more. We always drop off a Christmas card to our closest neighbours in 3 different directions, so there goes a good 20 cards. Then my customers, friends and my immediate family. Don't even ask me to do aunts, uncles, cousins etc. That in itself for my family (not including Chris' family) would be probably 200 some odd people. Put it this way, I don't know all my cousins. Heck I barely can remember all my aunts and uncles. Dutch people - Need I say more. LOL


Anyway today I have a Christmas card that I whipped up a few weeks ago. Very simple and clean. I stamped my Lovely as a Tree image in Versamark ink on Night of Navy cardstock, covered with White embossing powder and heat set. I layered this on Bordering Blue cardstock and used a miniscule amount of the loads of Whisper White grosgrain ribbon that I have. Yes, some of you may remember that ordering boo boo I made a year ago. I think I still have about 7 or 8 out of the 9 spools that I bought. Sigh. I think I may be set for life in that colour. I know I have the option of dying it but that just seems so messy to me.

Next I layered my matte to my card front and I stamped my Holiday Greetings from the Sincere Salutations set in Bordering Blue ink.

Thanks so much for popping by and sharing in my day to day.

Margaret :)

Tuesday, November 24, 2009

Serene Sunflower


Another little find in my stash of old card fronts. This card was nixed from whatever swap it was that I designed it for. If I mass produced it, I would have remembered LOL.

I do love this set though. It is a retired set called Serene Sunflower. I decided to step out of the traditional colours of a sunflower and instead I went with Pretty in Pink, Barely Banana and Mellow Moss to stamp the flower and leaves. I also used Pretty in Pink to add distressing to my image via a sponge.
The card base is Pretty in Pink with a layer of Mellow Moss laid over half of it. I stamped the Mellow Moss cardstock with my retired Print Pattern background stamp. I used Mellow Moss ink to stamp this pattern.

I punched out a strip of Mellow Moss cardstock with the Word Window Punch and distressed it using the direct to paper technique. I folded the strip in half and tucked under my main image.

I hope to be back tomorrow with more goodies to share with you.

Have a great day.

Margaret :)

Monday, November 23, 2009

My First Easel Card


You may be wondering where I disappeared to. One day I'm here and all is good and then poof, you don't hear from me for almost a week. That's because I ended up in emerg last week Tuesday and back to the hospital Wednesday for tests and home the rest of the week working on getting better. Let me tell you that was the worst birthday gift ever. It really bites when you are going through triage and they ask your date of birth and then say "oh, happy birthday" Yeah, not really cause if it was happy and good I wouldn't be there. Though, I've now returned and feel almost back to my old self.

Two weeks ago I made my very first easel card and have been super excited to share with you all.


This card was so much easier to do than I expected. I created it by using a 4" x 12" piece of Chocolate Chip textured cardstock as my base. I followed the instructions on Andrea Hayes blog for creating the easel part.

Next I used my Real Red textured cardstock for my first matte and layered Merry Moments Designer paper over this. This was repeated on both the front of the card as well as the inside of the card.

I inked two chipboard snowflakes with Red and White Craft ink and while they were still wet I added Iridescent ice embossing powder and quickly heat set. In the center of the white snowflake I added a Red Rhinestone brad and used my large glue dot to adhere to the red snowflake. I also used a large glue dot to adhere the red snowflake to the front of my card. Next I used Chocolate Chip ink to stamp my sentiment from the Teeny Tiny Wishes set and punched it out with the Modern label punch. I popped my sentiment up using dimensionals and finally I added a red button with some linen thread to the inside (base) of my card to hold up my 'easel'.

Thanks for popping in and have a great day.

Margaret :)

Tuesday, November 17, 2009

Christmas Card Stamp-A-Stack


I've been promising to share the 5 designs I have made for this week Saturdays Christmas Card Stamp-A-Stack and here they finally are.

Two of these five designs I got from Splitcoaststampers. The Joy card I CASE'd from user cmfwells on Splitcoast and the card showcasing two ornaments from the Tree Trimmings set I CASE'd from user maryloves2stamp on Splitcoast. The only thing I did different on this card is that I added a strip of Old Olive Cardstock and used my Scallop Border punch on the one edge.

After having CASE'd these two cards, my creative juices began to flow once again and I managed to come up with 3 designs of my own.
I really like showing people different folds for their cards so it was time to incorporate an old favorite. The pop up stand card (that's what I call it LOL)


I used some non-traditional colours for this card for an extra bit of different flavor, although you cannot see the Brocade Blue very well.

I also created a 6 x 3 card that stands tall rather than standing 3" high. A simple bit of designer paper, some gold cord (hoping my elastic cord arrives on time for the class- grimace) and the cute Mr.Snowman from the fabulous Punch Pals set and this card is finito.


My last design is one of my favorites and I will actually have my customers cut them out with less of a flat at the top, so that they end up with a fuller, more rounded card. I stamped the leaf image from A Cardinal Christmas, added the uber gorgeous desinger paper from the Christmas Cocoa DP (Holiday Mini), a sentiment and the sweet little bird from the Sizzix Birds & Blooms set, cut out from Real Red cardstock.


I am super excited for the class to arrive and make these great cards. I know they will all love them.

Tomorrow I'll be back with my very first easel card. Woo hoo!

Margaret

Monday, November 16, 2009

True Spirit

Good morning and welcome to another week. So I mentioned Friday that we were going to Cirque Du Soleil on Saturday and I just wanted to let you know that it was absolutely incredible. We were completely in awe the entire time. The singing, the clowns, the trampoline acts, everything was just completely mesmerizing. If you ever have the opportunity to go, take it.

Well, I cannot believe Christmas is just around the corner. I haven't even began shopping yet. Yikes. At least I have started working on some Christmas cards.

I have yet another card to show you today that I nixed from my designs for this week Saturday's Christmas Card Stamp-A-Stack. Tomorrow I will share with you the five designs that have made the 'final cut'. :)

I began with a Real Red textured cardstock, 3" x 6" for my base. The bottom layer is composed of Kiwi Kiss textured cardstock and the fabulous Christmas Cocoa designer paper. This particular sheet is a flocked design. It has great texture and I absolutely love it.


I stamped my Snowflake from Snow Swirled in Staz On White ink onto Vellum cardstock. I let sit to dry and then punched out using my Scallop circle punch. I punched out a scallop of Chocolate Chip cardstock and offset it from the vellum scallop just slightly. To hide the glue dot I used to attach my vellum to my Chocolate scallop, I added a smidge of two way glue and Dazzling Diamonds glitter to the center of the snowflake.

I stamped my sentiment in Real Red ink on Whisper White cardstock, adhered it to my card front and finally, I applied my snowflake scallop slightly over my sentiment with a dimensional.

Thanks for popping in and have a great day.

Margaret :)

Friday, November 13, 2009

A Merry Little Christmas


A few days ago I was chatting with my friend Karen, who was my former Stampin' Up! upline. Karen set a goal for herself at the beginning of the year to make one Christmas card per week. Each week while catching up on her blog I always find a sweet and delightful Christmas card that makes me smile. (Okay all her cards make me smile - she is very talented) She really has been faithful in making them and I had told myself I should do the same but do you think I listened to that little voice in my head, NO, of course not. LOL So Karen and I were discussing this and she has given me a bit of encouragement to do it for next year. So I am going to do my absolute best to do it. I would say that I would start on next years cards now but I still have to make this years cards so that won't work too well. That does however mean that you should be seeing lots of holiday cards on my blog.

Today I have a card that I was originally planning on having as part of my 5 designs for my Christmas Card Stamp-A-Stack in two weeks but I have come up with some designs that I like better, so this one got nixed. I have 4 out of 5 designs completed so next week I will post all 5 designs as a preview for the class.

I began with a 3 x 6 card base made using Real Red Textured cardstock. I added a layer of Chocolate Chip textured cardstock to my base.


Now the Holiday Mini catalogue is chock full of fantastic products, seriously, this is one Mini that I had a huge long list of products that I REALLY liked. One of those items is the Christmas Cocoa Specialty designer paper. One of the papers is a soft suede but it has a metallic, shimmery look to it. It is bee-u-tee-ful. So naturally I needed to use it on my card. I whipped out my scallop edge punch and punched both long edges. I tied some Old Olive grosgrain ribbon around my designer paper, cause it just needed that little touch.

Finally, I stamped my sentiment in Old Olive ink on Whisper White cardstock. The sentiment is from the Hostess Level 2 set, Christmas Punch. This particular sentiment coordinates in shape with the Wide Oval punch. So my finishing steps were to punch it out and then I popped it up on my card with Dimensionals.

Well that's it for me for another week. I will be back on Monday with more designs and creations to share with you.

Have a fabulous weekend. I'm sure I will as I'm off to see Cirque Du Soleil - woohooo!!!

Margaret :)

Thursday, November 12, 2009

The Colour Purple


It was interesting cleaning my stamping room last weekend. I finally came upon my overloaded cabinet with old swaps from upline events, regionals and convention. Although I haven't had a chance to go through all those boxes yet, there were some loose card fronts sitting in some open topped containers that I had made while debating what would be my final choice for my swaps. These poor card fronts were tossed aside as not good enough and left, lonely and forgotten. While browsing through them, I thought to myself that some of them were actually better than I remembered. LOL One of them I am sure I made and at the same time, I'm not 100% certain that I made it. Being as it was separate from my main box of swaps I believe it is mine but I think I CASED the idea of the card from elsewhere, which is probably why I'm confused. Perhaps one day I will share it with you.

Today, though I am sharing one of my other cards that I found. I believe that this card was for a swap where we were required to use background stamps.

Now my colour sense is not always perfect, so I'll be honest and say that I'm not sure if this is Elegant Eggplant or Perfect Plum. (I think it's the Elegant Eggplant) The card base is standard size and I stamped my Canvas background on it. My main image is also a background stamp, Floral, which I stamped in Versamark, applied Black Embossing powder and heat set with my heat gun.


Next I coloured some of my flowers and leaves. I'm pretty sure I used my Watercolour Crayons on this but it's too long ago to remember.

I layered my image on a matte of Old Olive cardstock and wrapped a bit of Vanilla grosgrain ribbon around one end.

I stamped my sentiment from Sincere Salutations in Elegant Eggplant and attached to my card front. Finally I adhered my image layer onto my cardfront to complete the card.

I will have a few more old creations to share with you over the next few weeks as well as some quick and easy Christmas cards that got nixed from my selection of cards for my Christmas Card Stamp-a-Stack.

Have a great day.
Margaret :)

Tuesday, November 10, 2009

Praying For You


For such a long time I have admired the stamp set Thoughts & Prayers and I finally twisted my arm to buy it. Oh you don't fool me, I know that you twist your own arm into buying products you like too!!!
So I pulled out some long retired Desinger paper from SU! that I absolutely love and refuse to part with (well, except to use on a card) and decided it would be good to use with this set.

I finally.... finally, pulled out my relic of a sewing machine (you may think I'm crazy, but about 4 years ago when I got it, free, it wasn't working and I spent $175.00 to get it fixed. Yes crazy, I could have easily purchased two brand new machines for that price) Anyway my old relic is simple and doesn't scare me like new machines do, so really, it's perfect. I was ecstatic to sew on my card but I do have to admit that I need to practice a bit to get those corners nice and straight. LOL
I am big on not having things poking through my cardstock to the inside of my card where it is visible. I like things to look clean and tidy, so I sewed my Designer Paper prior to adhering to my card base. (Adhering to the base is actually the very last step)

I really like square cards and since 5 1/2" square envelopes do not cost extra for postage this is a great size. My card base is made from Close To Cocoa textured cardstock, after sewing my DP, I added this. Next I coloured my image using my Earth Elements markers and stamped on my Whisper White Cardstock. I layered this on a piece of Close to Cocoa textured and used my zig zag stitch around the edge of the two layers. Next I layered on my DP.


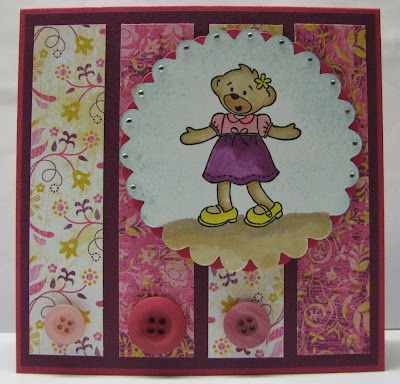
I just ordered in some large grommets and was a bit leary on getting the holes through my paper. I pulled out my Mat Pack and was trying to sort out my placement when what do you know happened, the prongs went right through all my layers of paper. I was tickled pink. All I had to do was fold over the prongs with my bone folder, easy peasy. :)

Next I tied a bit of linen thread through my Latte Button and adehered into the center of the grommet. It was like two peas in a pod, it was just meant to be. I finished up my card front by stamping my sentiment in Chocolate Chip ink and adhered all my layers to my card front.

The great thing about this card is that it works with this weeks Kraftin Kimmies Challenge - Stitch It Up!

Thanks for looking and have a fantastic Tuesday.

Cheers,
Margaret :)

Monday, November 9, 2009

Spread the Love for Jaimie Cates


I hope everyone had a good weekend. We were certainly blessed with wonderful warm weather and sunny skies.

Friday evening Chris and I attended a dinner party held by my employer. It was quite a nice place and they had a fabulous Motown group come up from Detroit to entertain us. They did a Supremes act, a Tina Turner act and a Donna Summer's act. (We didn't stay long enough for Donna Summer's unfortunately) They were fantastic and really interacted with everyone in there. We were home late (crawled in bed about 2:00am) and up at 7:00am Saturday morning. Needless to say Saturday is a bit of a blur for me as I was so stinkin tired. I was in bed before 9:30pm Saturday night, up at 7:30 to walk to the dog for a half hour, crawled back in bed and got up again at..... GASP...... 11:00am. Wowser, I lost half my Sunday but it felt oh so good to sleep that long. Chris had been up and out of the house already by 7:30am so it was peace and quiet for me. Actually, I think I woke up because of Madden's snoring. Who knew a dog could snore so loud. LOL
I managed to make a few cards though and I even tidied my stamp room up a bit more. I can now see the floor in every direction, except the one nook where Chris has some antiques that he needs to decide where they should go. It is really starting to look FAB in there.

Last week, I read a very sad story and if you are a huge blog reader, you may have heard this story already. It is about a young girl named Jaimie Cates. The following is a bit about her.


"On Oct. 4th, 4 teenagers armed with knives broke into a home in a small town in New Hampshire. Alone and sleeping inside were a mother and her 11 year old daughter. These 4 boys broke into this home with the intent to rob and kill anyone inside. They stabbed the mom, Kimberly Cates, to death and left her daughter, Jaimie, for dead in their driveway. It was a completely random act, their home was chosen only due to its secluded surroundings."

For more information on this wonderful cause visit Spread the Love - Stamp Something for Jaimie.
There is a card drive for Jaimie and everyone is encouraged to make a card and mail it to her to show support and hopefully bring some sunshine to her life and her family's life. May God give them the strength they need to continue on and find goodness in life.

This is the card I have made for Jaimie. I wanted a card with bright colours and I selected the bear image from Beary Best Friends because it looks like she is ready to give a great big hug.

I began with a Melon Mambo 5.25" square base. I layered Rich Razzleberry over top and added strips of Razzleberry Lemonade Designer paper over top. I coloured my bear image and sponged a light blue sky around her. (It almost looks like she is standing on a beach) I cut out my image using my Sizzix Scallop # 2 die in my Big Shot and cut out another scallop circle in Melon Mambo. I layered the two together and popped up on my card front. I added some Tiny Twinkles to the scallops to bling up my card and I added some cute Autumn Leaves buttons to the bottom of my card.

I hope that all the wonderful cards Jaimie receives help to lift her spirits and give her strength.
Please join in and bring some light to a little girls life.

You can mail your card to:
Jaimie Cates
c/o Mont Vernon Fire Station
Main Street
Mont Vernon, NH 03057

Thanks all and have a great day.

Margaret :)

Tuesday, November 3, 2009

Baby's First Year Scrapbook


Today I am excited to share with you a 6 x 6 scrapbook album created by one of my customers. Julie made this album for her sister in law's first baby Griffin. Julie got the idea for this scrapbook when she received one herself from her friend Julia a little over two years ago for her son's birth.


Julie called me to order the Tall Tales Designer paper and some Certainly Celery cardstock. She explained what she was planning to do with it and when she completed her project I had a chance to see it. WOW. Julie did an amazing job and I immediately asked her if I would be allowed to share it here on my blog. I am so happy that Julie agreed.

Each page is made from Certainly Celery cardstock. She then created layers and pockets with the Tall Tales designer paper and some solid coloured cardstock. Her monthly titles are made using a Quickutz alphabet die (which I must say is adorable).


The front cover is absolutely adorable with Griffin's name taking center stage. The fun little doodles and the colours are just fantastic together.


There are also some great touches of texture that Julie created using Cuttlebug embossing folders.
Julie used various embellishments that she picked up at a variety of craft stores on each of her pages which add just the right final touch. I do love the little monkey and giraffe that she added. So sweet and, in my opinion, just right for a baby boy.

She completed the album by binding it with o-wire and signing her name on the back cover.

I have to admit that seeing Julie's album has made me want to order that cute designer paper myself.

Thank you so much Julie for sharing this with us and allowing me to post it. I hope I got all the information down correctly.
Cheers and have a great day,
Margaret :)

Thursday, October 29, 2009

Merry Christmas to You

While working with my Simply Scrappin' kit I just couldn't resist making a card.

This is a quick 3" x 6" card. The card base is made with Real Red Textured cardstock. I then added a strip of the designer paper from the kit along with a piece of this adorable Christmas tree die cut border sticker.

I then used two more die cut stickers from the kit, layered over one another. The sentiment sticker is popped up with dimensionals to add a bit more depth to the card.

I'm off and running now - lots to do.

Margaret :)

Wednesday, October 28, 2009

Mommy and Me class projects

Good morning and happy Wednesday.

I don't know about you but this weeks seems to be flying by. I have photography class tomorrow already and think I'm a bit more prepared for this class. I certainly took nicer pictures this week than I did two weeks ago.
I got my car back yesterday afternoon. One of my 3 coil packs was pooched (my car has these instead of a distributor) and it was arcing all over the place causing my car to stammer and miss. Now she runs like a dream again and I am very thankful.

Today I am sharing with you the items that I have created for my Mommy and Me class on Sunday. I wanted a bit of variety for the kids so I have created a card, a 3-D item and a bag.
I used the Occasions Mini stamp set Beary Best Friends for the card, the Just Buzzin' By stamp set from the Idea Book & Catalogue, and for the Holiday ornament, I used designer paper and the new Ornament punch along with the pretties kit.


I have one young boy coming to the class so the card for him is slightly different so it is more suited for him.

Remember, today is the last day to sign up for this class and there is only one more spot available, so if you haven't already signed up, now would be a great time to do so.

Cheers,
Margaret :)

Tuesday, October 27, 2009

Christmas Jingle 6 x 6 Scrapbook

This morning I had to drop my car off at the mechanics shop which I am so not happy about but I need to ensure that my car is reliable to get me to and from work so I shouldn't complain. I am hoping that the issue is just the ignition leads and not something more costly. My poor girl is missing, especially when she's cold and just warming up on my drive. So I will have to patiently wait and see what the mechanic says.


For the past week I have been taking my Christmas Jingle Simply Scrappin' Kit with me to work and putting together some pages over my lunch break. These pages are all works in progress and will not be complete until I add pics at Christmas and more embellishments. I'm not sure how some people put together amazing pages with all kinds of embellishments and no picture on it. I like to add embellishments on top of my pictures or just off the edge of my pictures.


These are just a few of the pages I have put together. I have made created 5 double page layouts and two single page layouts already and have only used half the cardstock in the kit and I have more than half of the die cut stickers still. This kit is really great and I am thrilled that I have had time to work on putting it together.

This kit is being used in my Christmas Jingle 6 x 6 Scrapbook class on November 11th. Today is the last day to sign up for this class as I require time to order the kits in for the class. For those who live in my area, if you are interested in registering for the class please let me know by this evening.


Class details are as follows:
November 11th 7pm - 9:30pm
Margaret's home
Class Fee - $50.00 (includes cost of Christmas Jingle Simply Scrappin' Kit)
Class Size - Max. 6 people
Pre-Registration required by October 27th
Payment required at time of reservation.

Margaret :)